Go to the Tools menu, click Continuous Flow Calibration.
In the Continuous Flow Options window, select Continuous Flow Calibration and then click Next.
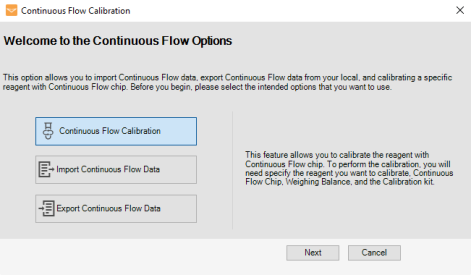
Continuous Flow Option Window
In the Continuous Flow Calibration wizard, select the calibration type from the following options:
-
Click New Calibration to create a new calibration for the desired reagent and click Next.
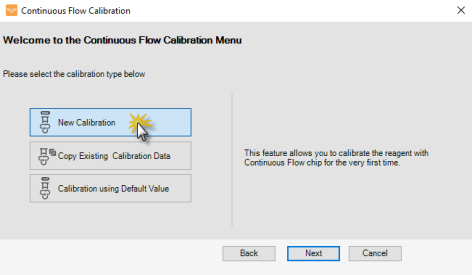
Select New Calibration in the Continuous Flow Calibration Wizard
-
Select the chip port position to assign your reagent from the Select Chip Port Position list, then click Next.
Note: When you select the chip port position, the chip's serial number will automatically display in the Chip Serial Number field.
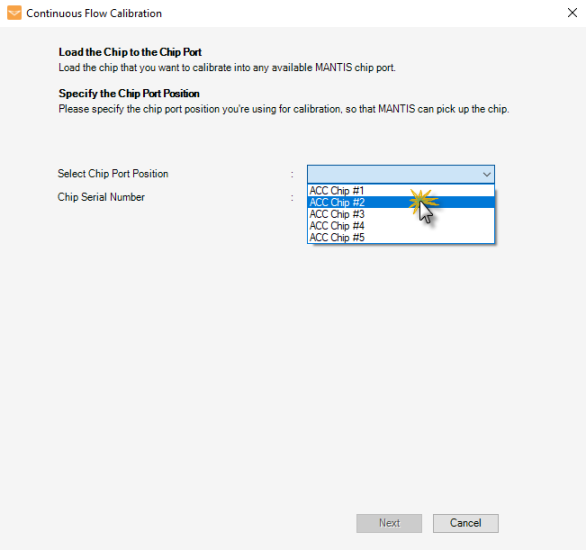
Select the Chip Port Position
-
Specify the calibration setup by following the steps below.
-
Next to Reagent Name, select the reagent you want to calibrate.
-
Select the Reagent Viscosity for your reagent. MANTIS CF can support viscosities from 1 to 25 cP. This viscosity value is used for nozzle recommendation and does not impact the calibrated volume.
-
If you know the density of your reagent, select I know the Reagent Density and type the Density for your reagent in g/mL in the corresponding field. If you do not have the reagent density value and want to measure it during the calibration process, clear the I know the Reagent Density checkbox, if selected.
-
Select the Nozzle Size of your chip from the available options, such as 0.1 mm - Red, 0.6 mm - Maroon, and so on.
-
Select the appropriate Bottle Pressure value from the following options: 3, 6, and 10 psi.
Important: Make sure to select the supported Nozzle Size and Bottle Pressure based on your reagent viscosity to prevent any dripping during dispense. If this warning sign
_20x20.png) appears next to the Nozzle Size or Bottle Pressure field, hover over it to see the recommended bottle pressure and nozzle size values from MANTIS. You can ignore these warnings and continue the calibration, but the calibration may not produce a quality dispense.
appears next to the Nozzle Size or Bottle Pressure field, hover over it to see the recommended bottle pressure and nozzle size values from MANTIS. You can ignore these warnings and continue the calibration, but the calibration may not produce a quality dispense. -
Select the Bottle Size accordingly: Small (100 mL), Medium (100-250 mL), or Large (250-500 mL).
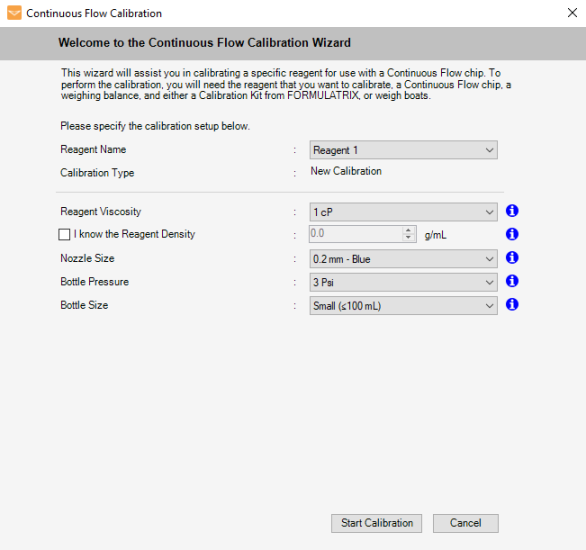
Data Calibration Has Been Set Up and Ready Proceed
-
- Click Start Calibration to proceed to the following instructions:
Do you have the Calibration Kit from FORMULATRIX?
-
Click Yes, I have the Calibration Kit if you want to use a vial rack and Eppendorf-style tubes for calibrating. Then, click Next to proceed to the next step.
OR
-
Click No, I don’t have the Calibration Kit if you want to use your own weigh boats. Then, click Next to proceed to the next step.
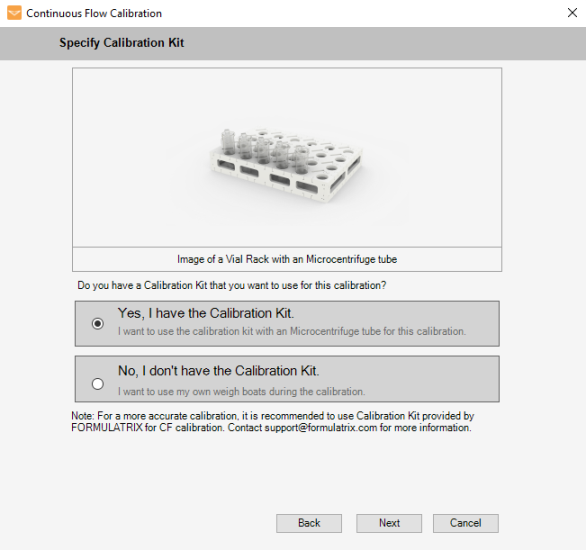
Specify the Calibration Kit
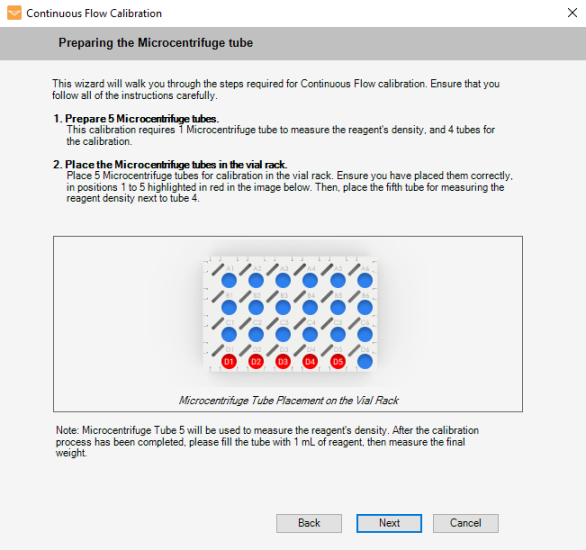
The table below explains in detail the required preparation for the microcentrifuge tubes and the weigh boats.
| Calibration Tools | Instructions |
|---|---|
| Microcentrifuge Tubes |
|
| Weigh Boats |
|
-
To calibrate a reagent using the existing calibration data from similar reagent, click Copy Existing Calibration Data, and then click Next.
-
Specify the calibration setup by following the steps below.
-
Next to Reagent Name, select the reagent you want to calibrate.
-
Select the desired calibration data from the Select Existing Calibration Data list. At this stage, the copied calibration data will be automatically displayed in each respective field.
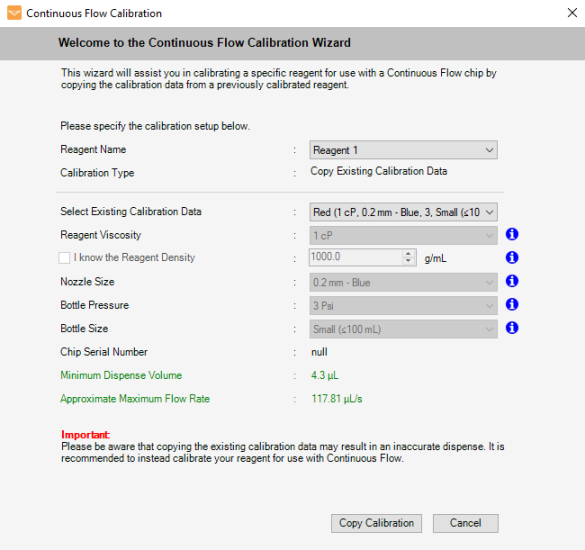
Copy the Existing Calibration Data
-
-
Click Copy Calibration and proceed to step 4.
-
For any reagent with approximately 1 cP viscosity (water-like), you can click Calibration using Default Value, then click Next.
-
At this stage, the Reagent Viscosity field has been automatically assigned to 1 cP.
-
Define the nozzle size, bottle pressure, and bottle size in the provided fields.
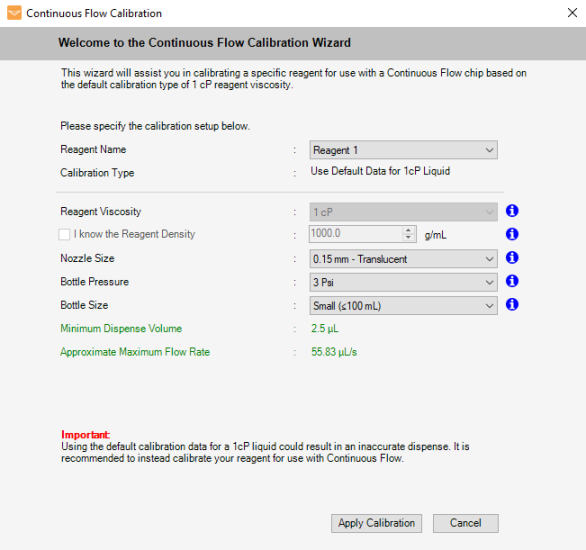
Use Default Data for 1 cP Viscosity Reagent
-
Click Apply Calibration to apply the setup value and proceed to step 4.
Congratulations! You have successfully calibrated the reagent for a CF chip. You can see the results of the calibration displayed in the wizard. Click Finish when you’re done.
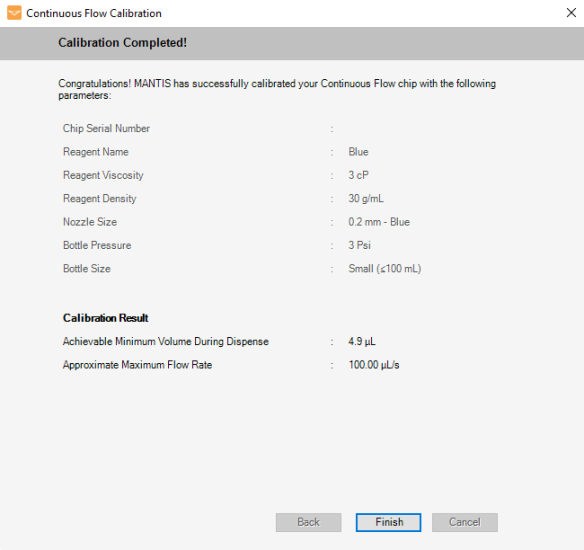
Calibration Is Complete
_400x336.png)
